Tableau Dashboard with Sliding/Collapsing Menu.
Wednesday, April 25, 2018
Tags: tableau, dashboard, sliding menu, collapsing menu, tricks
Yesterday, someone asked me for the idea of a dashbard with sliding / collapsing menu. It seems like it was a quite common question within Tableau Community. So I have decided to make an easy to understand version of it for all who need it.
I will try to explain it all step by step so that you can go through. Final product will be as below:
- First we need data! :) For this example I used Global Store sample data (click here to download) as well as a dummy csv to open/close menu section (click here to download)
- Then I have just created a sheet to place on my dashboard with some filters and highlighters
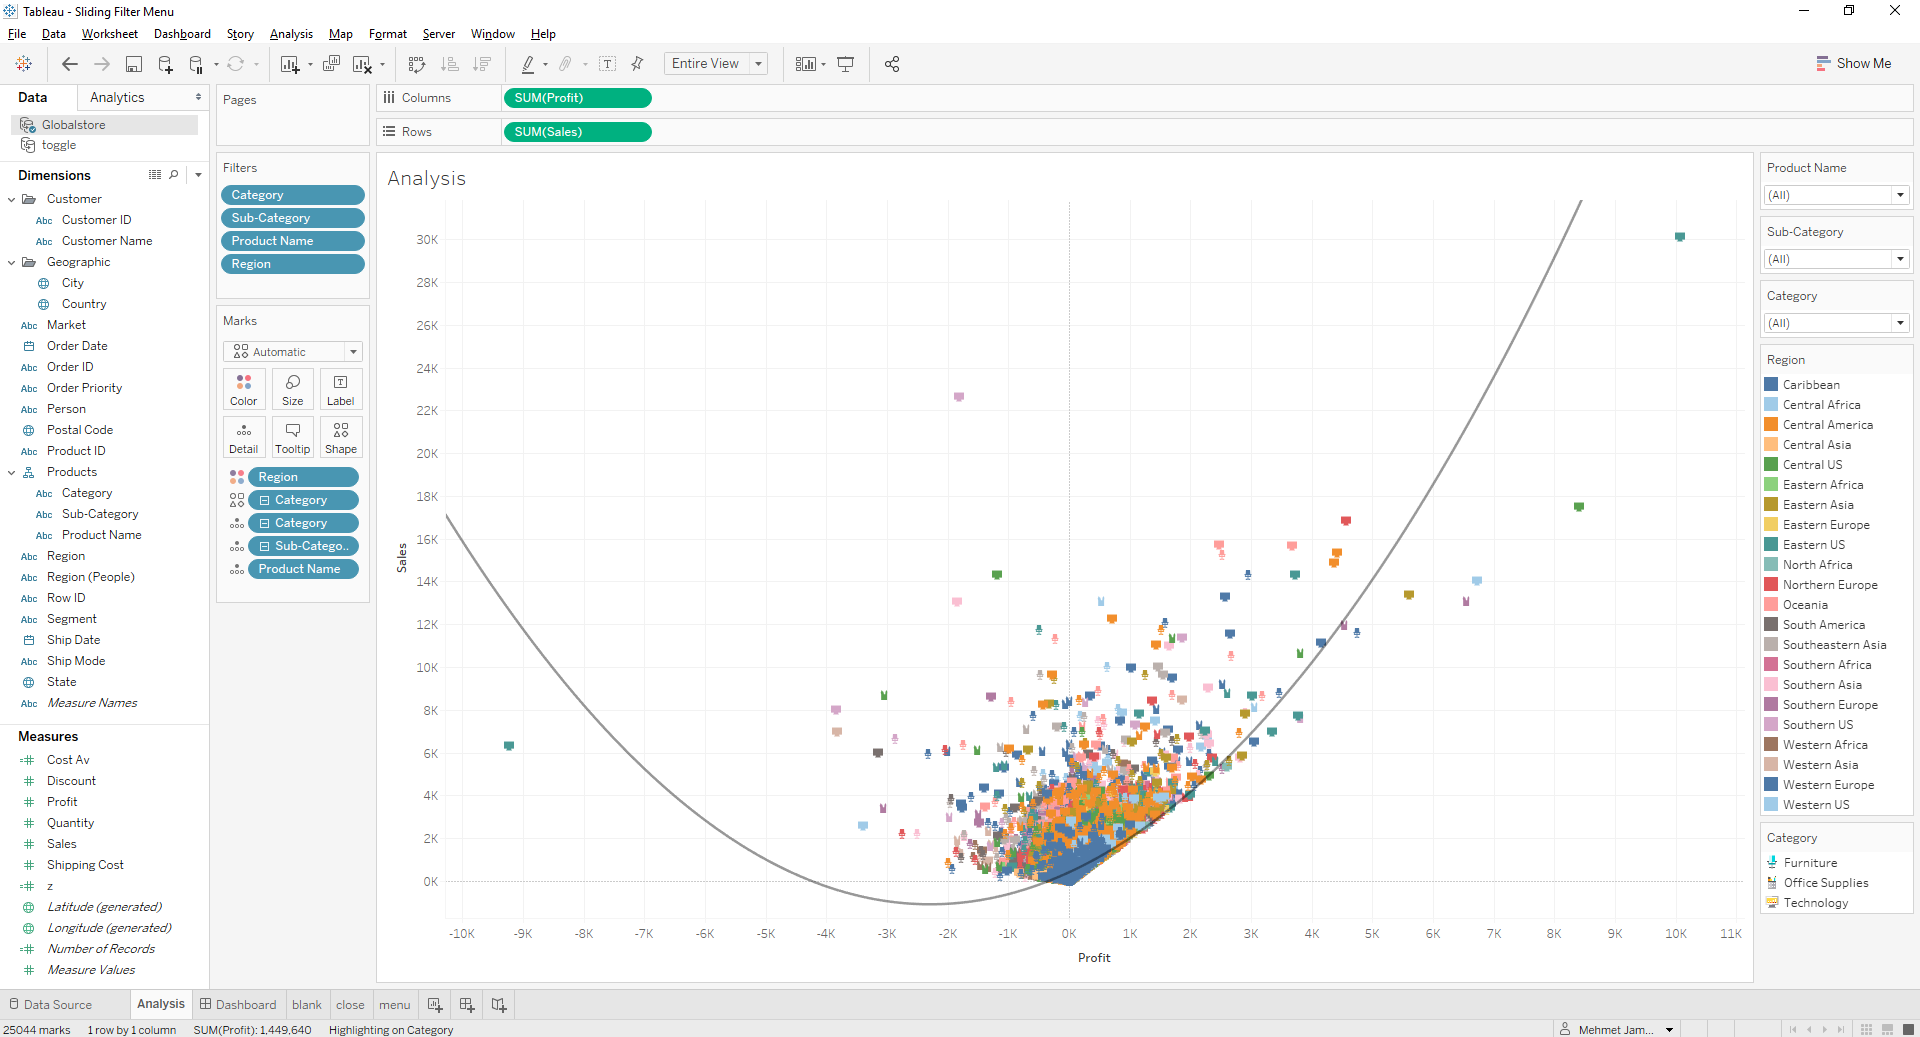
- Later using dummy toggle datasource you need to create 3 more sheets. One for close, one for open, and one empty sheet.
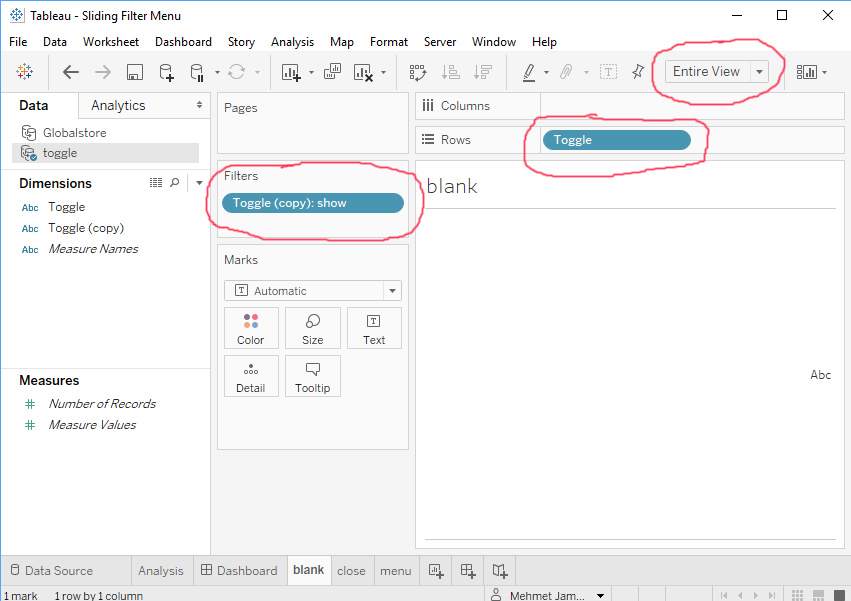
Here this is very important: Make sure sheets have Entire View
selected as their view format
This is important because it enables sheets (especially "empty" one) to take up all the space available within container.
- Empty sheet is literally empty :) I named the sheet as "blank". Here at
toggle
datasource there are two toggle dimensions. At blank page, I am going to use copy version of toggle as filter (select "show") and I am going to use other one in "close" and "menu" sheets later to be used in dashboard action.
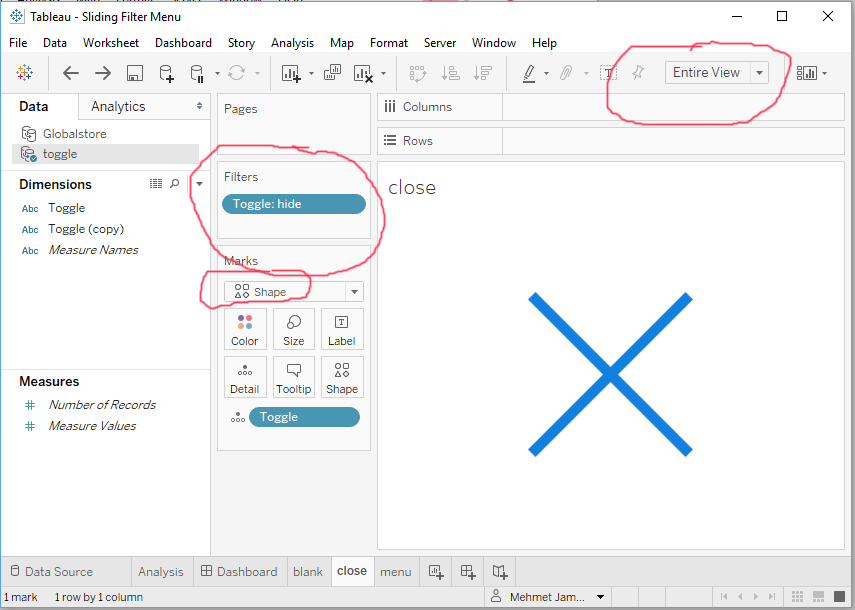
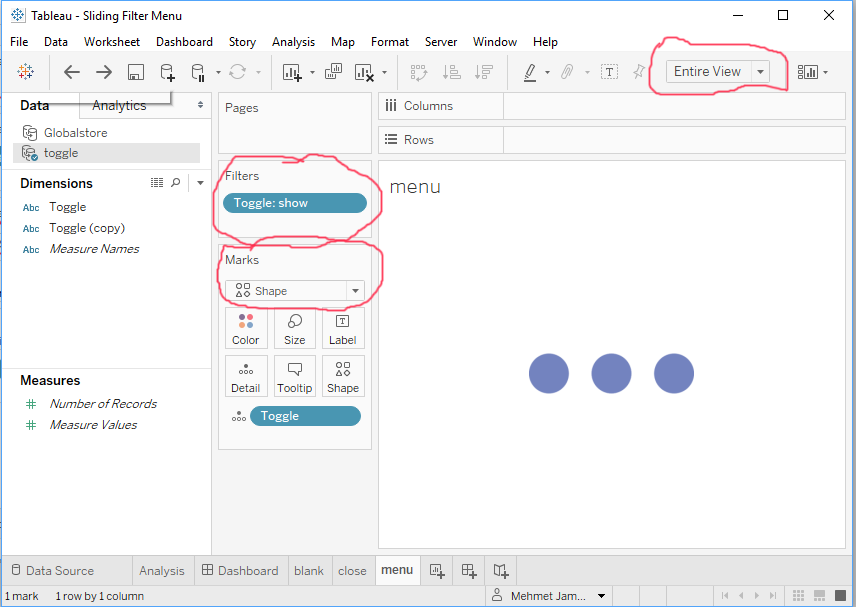
- Then we need "menu" and "close" sheets with shapes so that we can assign dashboard actions on them. Now I am going to use "toggle" without copy in these sheets. "close" will have
hide
selected, and "menu" will have show
selected.
Now that we have all our sheets ready, we can create the dashboard.
-
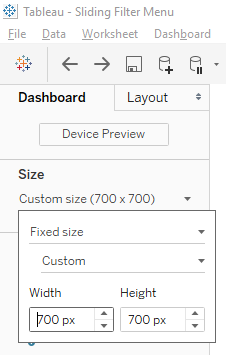
We need to make the dashboard size fixed. This is crucial as this trick will not work otherwise. The size of the dashboard should be same as the size of analysis sheet to be shown. In my example. I used 700x700
-
Next, we need a floating horizontal container with the same height of dashboard and with the width equal to
(analysis pane) + (filter menu pane x 2) = 700 + (200x2) = 1100
It will also be located at x:-200, y:0
where 200 is the width of your filter menu pane.
Also for the sake of simplicity of calculating widths, I changed all paddings to zero for the containers.

-
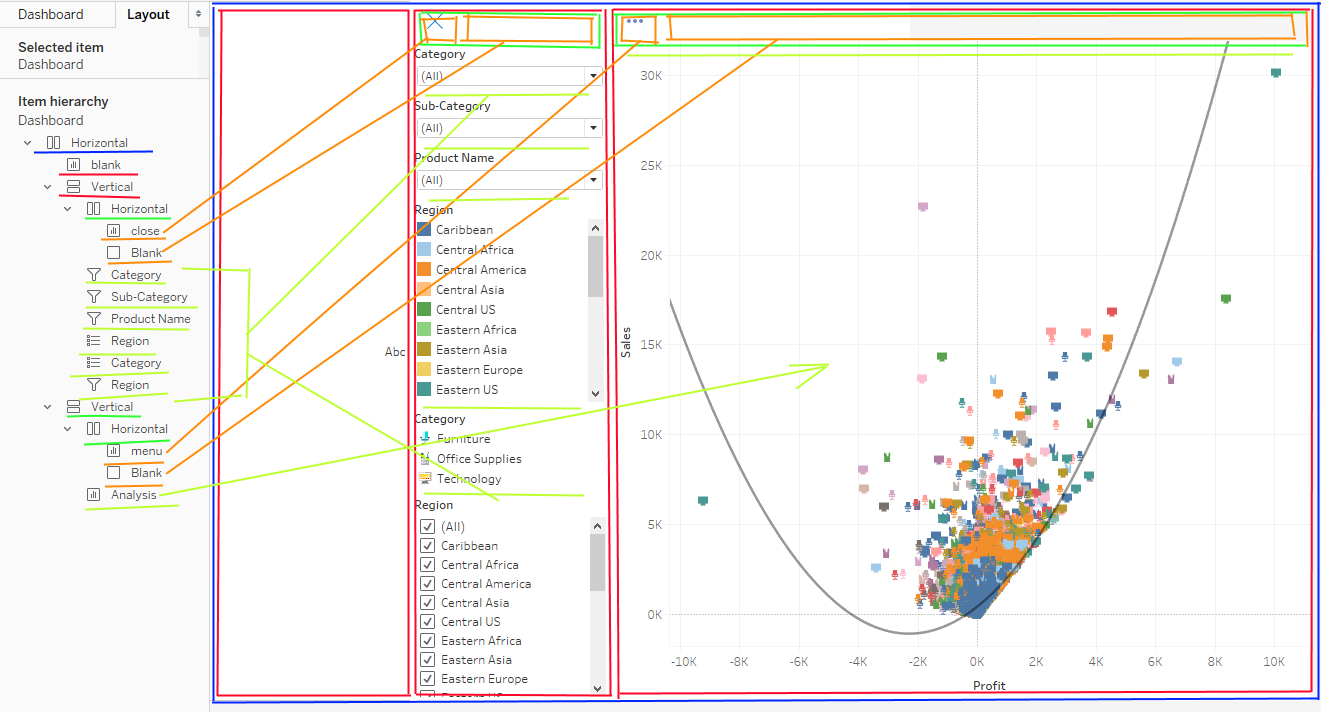
Now, you can place your objects as tiled into this horizontal container. We will add "blank" and 2 vertical containers. "blank" should not be fixed sized where vertical containers must be fixed in width as follows:

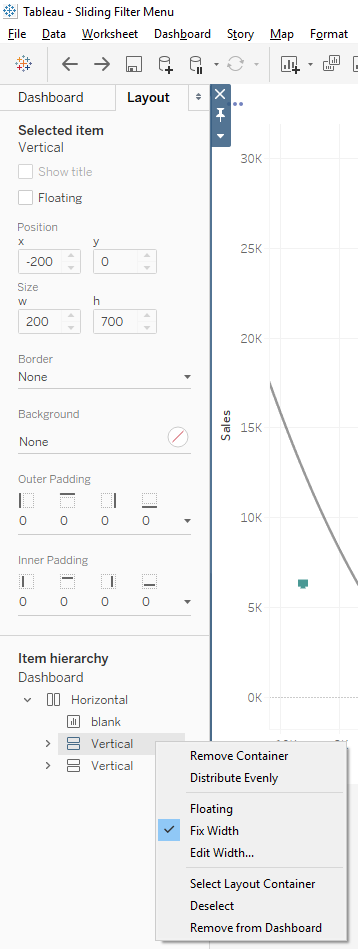
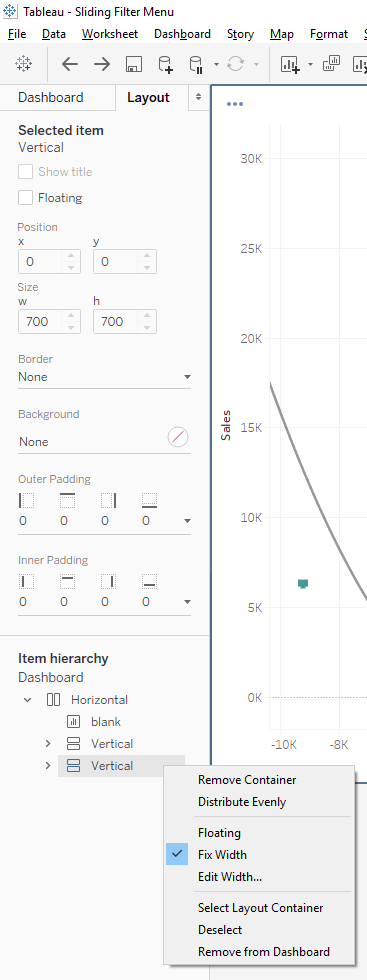
First vertical container will be used for filters so its width is 200px for my example.
Second vertical container will be used for analysis sheet.
-
From this point on, it is all up to you how you place the filters and sheets.
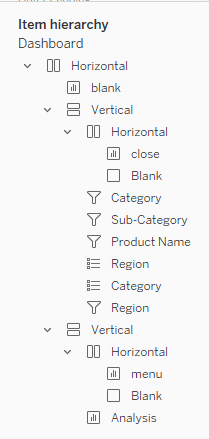
My final layout is as seen below. Here everything is visible. You should also work with x=0
first then change it to -200
so that you can work easily.
-
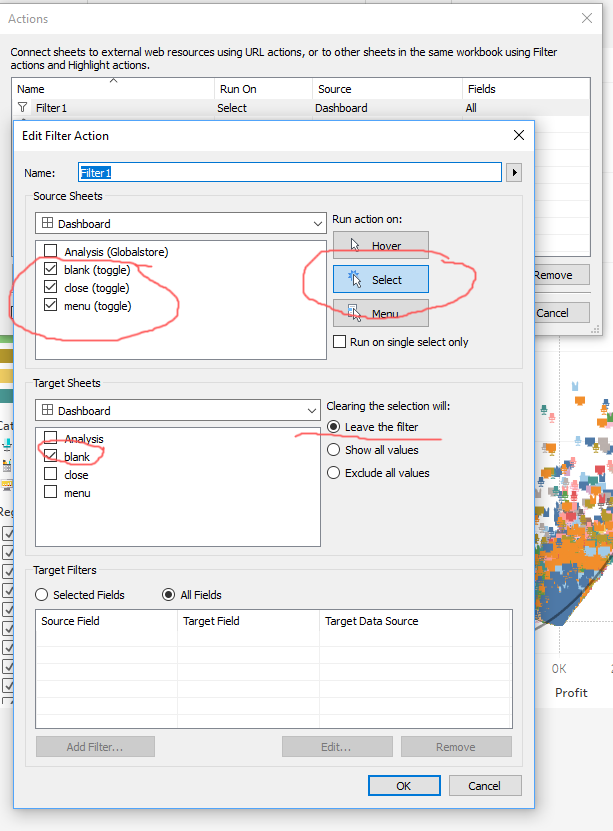
Finally dashboard action:
That's all folks. I hope this helps you out solving this problem. If you have any further questions please do not hesitate to CONTACT ME.